How and How Long:
- I had design constraints due to the sizes of the bits
of plywood I bought. The biggest piece was 850 x 800 mm, and the slide was
650 mm long, so the table top ended up 850 x 650 mm. I made it 150 mm deep,
because that looked about right. Both the base and side of the gutter were
90 mm, again, an eyeball choice, and once assembled, made for a trench 90
mm wide and 75 mm deep (because of the way I overlapped the pieces, and
because the base of the trench was made using 5/8" plywood).
- Rip to the right width, cut to length, and assemble
with wood glue and a brad nailer. The resulting holes are punched below
the surface and are easy to fill. Add end pieces for the gutter to stop
bricks falling out.
- Install the slides on the inside of the tabletop, and
measure for the table/storage box. I made the side pieces 200 mm high.
Assemble into a rectangle of the right size to fit exactly inside the
tabletop (don't forget to account for the slides!). Cut some 2 x 2 for
legs - I ripped these out of an offcut of 2 x 6, and rounded over the
edges with a curved bit in my router. Mine were 600 mm long. Glue and nail
into the inside of the box, then add a base.
- Use the slides to join tabletop and storage box. Attach
caster wheels to two pieces of 2 x 3 for additional legs, and cut to the
right length. Screw down into the top of the legs through the base of the
gutter.
- I made a 3 x 4 grid of roughly square boxes to divide
up the storage area. It's not glued in place, in case we want to modify it
in future. The dividers are roughly 200 mm square. I cut slots with a
jigsaw to assemble it without any fasteners.
- I still hadn't used up all the plywood, so I made a
couple of storage boxes that would also serve as seats. Again, the size
was entirely dictated by the plywood. I made a six-sided box about 2' x 1'
x 1', and sawed it in half on the bench saw to make two open boxes. The
lids were made out of another offcut of 5/8" plywood I had lying
around. I added a piece of 1/2" plywood to the underside of the lid
so it would stay on, and rounded over all the edges with my router.
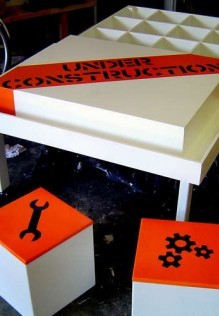
- Choose a font that would be suitable to stencil. After
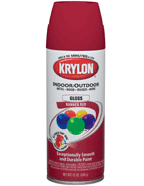
priming it and painting it white, the orange diagonal band was painted on
using Krylon Indoor/Outdoor spray paint. We blew up the lettering, printed
it out and cut out the letters, then assembled into a single stencil. We
lightly glued it to the surface using a glue stick (which wipes off easily
with a little water) and spray painted the lettering on in black. The
seats were similarly treated, the boxes white and the lids orange with
construction icons (gears and a wrench) in black. Again, we used stencils
and spray paint. Spray paint has the advantage of being easy to apply to
stencils, and it is hard-wearing - important in this application given the
abuse it's likely to get!
- Load with Lego’s, and let your construction workers get
stuck in! The storage box seats are good for the Lego instructions. The
table is of course equally suitable for other construction toys. The
design is pretty flexible - you're only constrained by the lengths of the
slides you buy, and these come in up to 36" lengths if you wanted a
big table. The table could easily be made as a box rather than with legs
if you wanted a cupboard or drawers underneath.
For complete instructions, visit:
http://www.instructables.com/id/Lego-construction-table/
Approximate project time: 6 hours.
|