How and How Long:
- Take apart your fan: A. Prepare the box fan to be taken apart by turning off the fan and unplugging it from the outlet. B. Unscrew each screw with the screwdriver. There should be about four to eight screws, depending on the brand and model of box fan. C. Remember to put the screws in a safe place so you can put it back together. D. Remove the front plastic screen from the box fan's body and put it off to the side.
4 Place the box fan on its back. Lift the blades away from the fan's hub.
- Cleaning: To clean it I simply use dish soap, water and Ajax, which is like a powdered
bleach. You can clean it with other products too. Just about anything will
work. Just make sure to have your fan nice and clean because who wants to have
a dirty fan right? Plus cleaning will make your surface easier to work with.
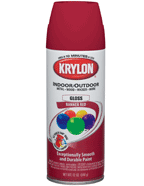
- Choosing Paint: When choosing the paint make sure it works for the type of fan you have.
- Painting: When painting with a spray can, I suggest painting with a gun (it's about 2 bucks and it keeps your hands/fingers clean, plus it keeps you from getting finger cramps). Like I mentioned before, for plastic you will need to go over it with the Plastic Primer so the paint actually stays on. Let it dry and then go over it with the color you chose. As for the other parts (non-plastic) all you have to do it paint and let it dry!
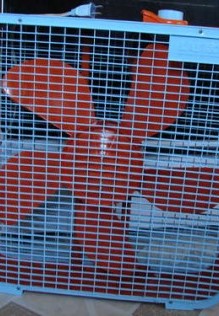
- Yay! Finished Project!
After everything is completely dry, all you have to do is put it back together and your all set and ready to show off your fancy new fan!
Approximate project time: 1 hour.
|