How and How Long:
- To get started, spread out your newspaper or tarp and lay out all the clay pots. Remove any stickers that may be on the pots and begin priming each pot. I only had to apply one coat of the primer.
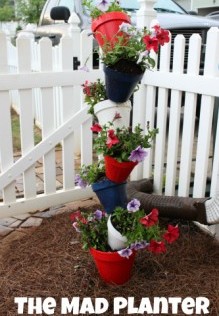
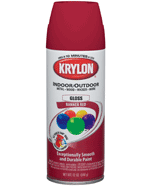
- Once all the pots are primed and dry (it shouldn't take too long to dry, especially if it's 85 degrees outside like it is here in Georgia today), decide on the colors you'd like to incorporate and begin to spray paint. As I mentioned, we decided on a red, white, and blue theme. I think they'd look great with one color or even a stenciled pattern of some kind as well. The possibilities are truly endless and completely up to you! I used Banner Red and Navy Blue Krylon Indoor/Outdoor Spray Paint.
- While the pots dry once again, decide where you want to put your Mad Planter. We decided to put ours in our backyard since that's where we hang out most of the time when we're outside. I swear, every time we've gone outside since putting the Mad Planter in, we comment on how much we love it. My hubby was nice enough to hammer the rebar into the ground for me (I'm extremely handicapped when it comes to trying to use a tool...I need to fix that). He thinks he put it about 2 feet into the ground, so a little wind won't disturb our Mad Planter!
- Before you can begin assembling the Mad Planter, you'll need to seal the pots with some polyurethane. I used a fast drying, clear gloss poly made by Minwax. Each coat completely dried in about 1 hour! I know it's boring to wait around for paint to dry, but trust me, you need the polyurethane, otherwise the sun and rain will ruin your pots. I'm hoping that this paint and sealing job will last us for a few summers before we need to sand and re-paint.
- To assemble the Mad Planter, simply "string" the hole in the bottom of the pot (you know, the one for water to drip out of) onto the rebar, like so.
- The 8" pot is the base of the Mad Planter and should lay flat. The rest of the pots are still "strung" through their water holes, but sit on the rim of the pot below, making each one look slanted. We filled each pot with soil as we assembled the entire planter, and added some red & blue-ish petunias as well. I am absolutely thrilled with the end result!
Approximate project time: 4 hours.
|


