


Fun With Terra Cotta Pots


| At your next outdoor gathering, place these colorful terra cotta pots along the table as a centerpiece or in front of each guest as gifts to take home. | 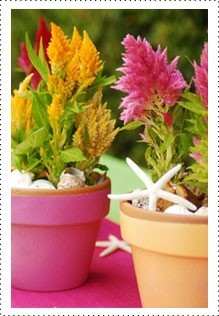 |
||
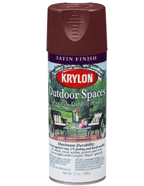
What you need:
Terra cotta pots are great for many uses. They come in a variety of sizes, they're versatile, they're inexpensive, and so easy to work with. The key to this project is color. You can choose one color for all of your pots or mix it up and try all of the colors that you secretly have always wanted to try but were hesitant to commit to inside your home. This is great for an outdoor entertaining party or to bring a side table to life. You can even bring these in to your kitchen and place them on a bay window or fill them with summer herbs. To use your pots as a centerpiece for your garden party use smaller sized pots as so that you can see over them and don't have to move them for conversation. I like to keep the top part of the pots taped off so that the natural terra cotta can still be seen at the rim. This adds both visual interest and contrasting texture. You can experiment with this further by taping off stripes or shapes instead or making the rim even larger. Fabric stores and remnant bins are a great resource for bright colored fabric. If you have a sewing machine just run it along to create a simple hem. This way you can make a tablecloth or runner in the colors you want inexpensively. Since the pots are brightly colored, fill them with brightly colored flowers. You can also just use one color as that will make a statement as well. An alternative to Celosia would be Gerbera Daisies as they come in a variety of colors. You can also use succulents for a different more contemporary twist. Get creative when you are finishing off your pot. Incorporate the style or theme of your party with the topper to your soil. We chose shells and used them to cover the soil but also to style the table. For more sparkle or an evening event you might try colored glass stones, like the ones people use in fish tanks. Green moss is also simple and effective. Since the pots are smaller, cluster them together in the center or run them down the table. You can always vary the height and shape based on what is available at your local garden supply store or in your garden shed. Just make sure to wash them well and let them dry before painting so the paint will adhere. They also double as a fabulous take home gift at the end of the party. |
 |
||
How and How Long:
|
What it Costs:Approximate cost is $32. |


