How and How Long:
- Cut the ears out of the tin (approx 14" long by 4" inches wide) using the tin snips (scissors for cutting sheet metal), making sure to leave a 2" tab at the base of the ear where it will be joined to the head (to be covered by fur later).
- Use the pliers to bend the ears into a slightly rounded shape and bend them up from the tabs.
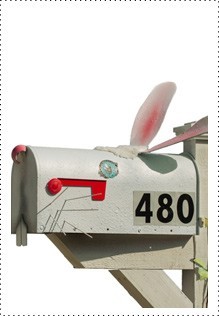
- Using the Krylon Webbing spray, give the mailbox (take the flag off first!) and the ears an even coat to simulate the texture of fur.
Cut the rabbit's teeth out of the leftover tin (approx 4" tall by 2-1/2" wide).
Using the dremel, cut or grind out two nostrils in the plastic dome.
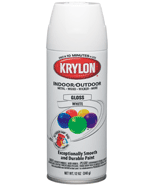
- Once the webbing is dry, take the nose, teeth, ears, mailbox and plastic tubing (for the whiskers!) and give all an even coat of Krylon Indoor/Outdoor White Primer, then once dry, a coat of Krylon Indoor/Outdoor Flat White. For the nose, instead of Flat White, use Krylon Indoor/Outdoor Gloss Watermelon.
- Highlight the ears by giving them a light spray of Gloss Watermelon down the center. Highlight the bunny's mouth by lightly spraying the Krylon Indoor/Outdoor Gloss Classic Gray on the front of the mailbox in an upside down "V" shape. Use the Krylon Indoor/Outdoor Gloss Peekaboo Blue to spray a solid circle for the eyes, in the middle of the mailbox's sides about 6 inches from the bottom.
- Drill a hole in the top of the mailbox, about 6 inches from the rear slightly SMALLER than the width of your screw. Drill the same holes in the middle of the tabs of the ears. Using the screw gun, carefully attach the ears to the mailbox. Take the piece of wood and put it inside the mailbox underneath the hole, so the screw has something to drill into.
- Drill 5 holes on either side of the mailbox, below where the flag will be, slightly BIGGER than the tubing/straws.
- Thread them through and use hot glue to attach them on the inside of the mailbox.
- Use black and white acrylic paint to finish the eyes and draw a line on the teeth.
- Use a hot glue gun to attach the fur where the ears meet the head. Use hot glue to also attach nose and teeth.
- Reattach flag.
Tip: If at any point you mess up using the spray paint, don't worry! Paint over it with the white and try it again!
Bunny Mailbox by Michael Boothby
Approximate project time: 1.5 - 3 hours.
|


